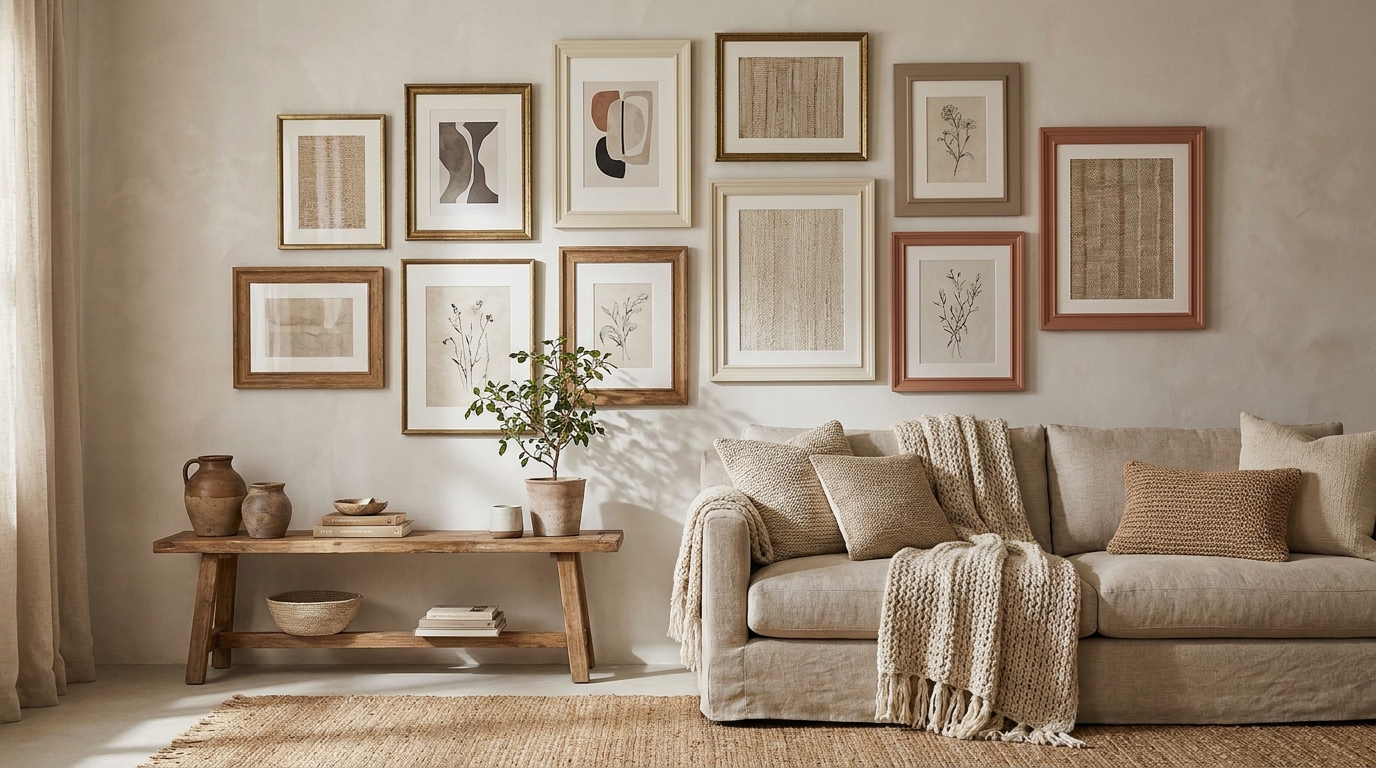
Ask most people how they choose gallery wall frames and the answer is roughly the same: they buy a matching set, hang them in a grid, and wonder why the result looks like a hotel corridor. The problem isn’t the frames. It’s the sizing. A gallery wall works when it uses a deliberate size hierarchy rather than uniform dimensions. Get the hierarchy right and the wall reads as intentional even when the frames don’t match. Get it wrong and even expensive frames look random.
[INTERNAL-LINK: complete gallery wall guide → gallery-wall-ideas-2026-complete-guide]
Key Takeaways
- The 1-2-3 sizing hierarchy (one large anchor, two medium, three small) is used in over 70% of professionally styled gallery walls, according to Framebridge’s design team (Framebridge Design Guide, 2024).
- MDF frames are lighter and cheaper but can warp in humid rooms. Solid wood frames cost more and hold hardware better long-term.
- Mixing metal finishes is fine. Mixing frame depths on the same wall creates uneven shadow lines that make the arrangement look unfinished.
- Standard mat reveal sizes are 1.5 inches (casual) and 2 inches (gallery-standard). Wider mats make small prints look more expensive.
- Budget picks start at $6.99 (IKEA RIBBA). Investment frames from Framebridge and Artifact Uprising run $60 to $180.
What Is the Frame Sizing Hierarchy Formula?
The 1-2-3 sizing rule is the most reliable starting point for gallery wall frames: one large anchor frame, two medium frames, and three small frames. Framebridge’s in-house design team reports this ratio appears in over 70% of the professional gallery walls they style, because the size contrast creates visual movement without becoming chaotic (Framebridge Design Guide, 2024). It’s not a rigid law. It’s a ratio that works because the eye needs a clear entry point before it explores the surrounding pieces.
The anchor frame is your largest piece. For a standard 8-foot wall, that means 16×20 or 18×24. For a smaller accent wall or a hallway, 11×14 works as the anchor. The medium frames sit at 8×10 or 5×7. The small frames fill in at 4×6 or smaller. The goal isn’t symmetry. It’s a visual weight distribution that feels resolved.
[INTERNAL-LINK: layout arrangements → gallery-wall-layout-ideas-20-arrangements]
When to Use Each Standard Frame Size
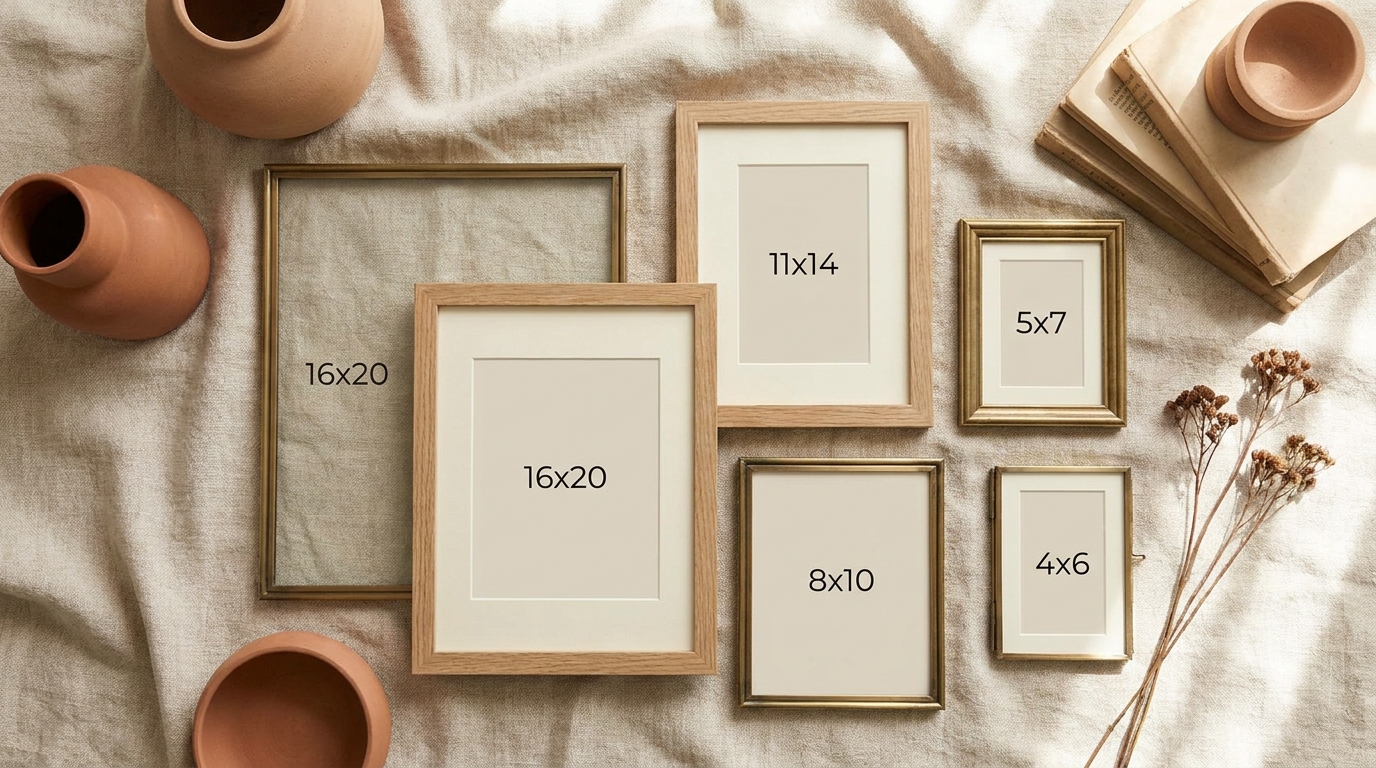
16×20: Best as the anchor in any arrangement on a standard living room or bedroom wall. At this size, the print inside is large enough to read from across a room. Use it for photography, botanical prints, or abstract art where scale adds impact. It’s heavy enough to need a wall stud or toggle bolt, not just an adhesive strip.
11×14: The versatile anchor for smaller walls, hallways, and apartment spaces. It reads as the “hero” piece without overwhelming a wall under 6 feet wide. Works well in a grid of three where this sits center-flanked by two 8x10s.
8×10: The workhorse of any gallery wall. Most photo printing services default to this size, and it works well with both landscape and portrait orientation. Two or three 8x10s form a natural middle layer around a 16×20 anchor.
5×7: The connector size. Use 5×7 frames to bridge the visual gap between medium and small frames, or to add a third row below an 8×10 grouping. They’re particularly effective for personal photos where faces need to be legible. Too many 5x7s in a row creates a monotonous band. Mix with 4×6 to break it up.
4×6: The detail frame. Use 4×6 at the edges of an arrangement or as fill between larger pieces. At this size, text-based prints (quotes, pressed botanicals) work better than photos because individual faces become too small to read. Four 4×6 frames grouped in a 2×2 quad read almost like a single 8×10.
How Do Frame Materials Compare?
Frame material determines weight, wall projection, durability, and long-term performance in different humidity conditions. A 2023 survey of professional picture framers by the Professional Picture Framers Association found that material choice accounts for more gallery wall failures, sagging, and warping than any other single factor (PPFA Industry Survey, 2023). Understanding the difference between MDF, solid wood, and metal before buying saves you a replacement trip eighteen months later.
MDF Frames
MDF (medium-density fiberboard) is the most common material at the budget end of the market. IKEA RIBBA frames and most Amazon multi-packs use MDF. It’s lighter than solid wood, machines cleanly to tight tolerances, and takes paint or veneer finishes well. The weakness is moisture. MDF absorbs humidity and can bow or warp in bathrooms, laundry rooms, or humid climates. For a living room or bedroom in a climate-controlled apartment, MDF performs fine. For a kitchen or bathroom gallery wall, avoid it.
Weight is the practical advantage. A 16×20 MDF frame typically runs 1.5 to 2 pounds. A comparable solid wood frame runs 3 to 4 pounds. On a rental wall where you’re relying on Command strips or small picture hooks, the weight difference matters significantly.
Solid Wood Frames
Solid wood frames hold hardware better, resist warping in variable humidity, and tend to age gracefully rather than deteriorating. They cost more, typically $20 to $60 at mid-tier retailers for a single 8×10 frame. The added weight means you’ll need proper wall anchors, especially for frames above 11×14.
We styled a client’s rental bedroom gallery wall using a mix of IKEA RIBBA MDF frames and two solid wood Target Threshold frames as anchors. Within six months, two of the MDF 8×10 frames had developed a slight warp from the room’s humidity (the apartment faced south and the wall got afternoon sun). The solid wood anchors stayed perfectly flat. The fix was simple: replace the affected frames, but it confirmed that mixing materials strategically, solid wood for anchors and MDF for small fill frames, is worth the modest cost difference.
Metal Frames
Metal frames (aluminum profile frames) sit at the other end of the weight spectrum. A 5×7 aluminum frame can weigh under half a pound. They’re rust-resistant, don’t warp, and work especially well in modern, industrial, or minimalist arrangements. The finish options are narrower than wood (typically matte black, gold, silver, or brass), and the profile tends to be thin and sleek rather than substantial. They’re a strong choice for a modern gallery wall but look out of place in a traditional or farmhouse-style room.
[INTERNAL-LINK: how to hang step-by-step → how-to-make-gallery-wall-7-steps]
How Do You Mix Frames Without the Wall Looking Chaotic?
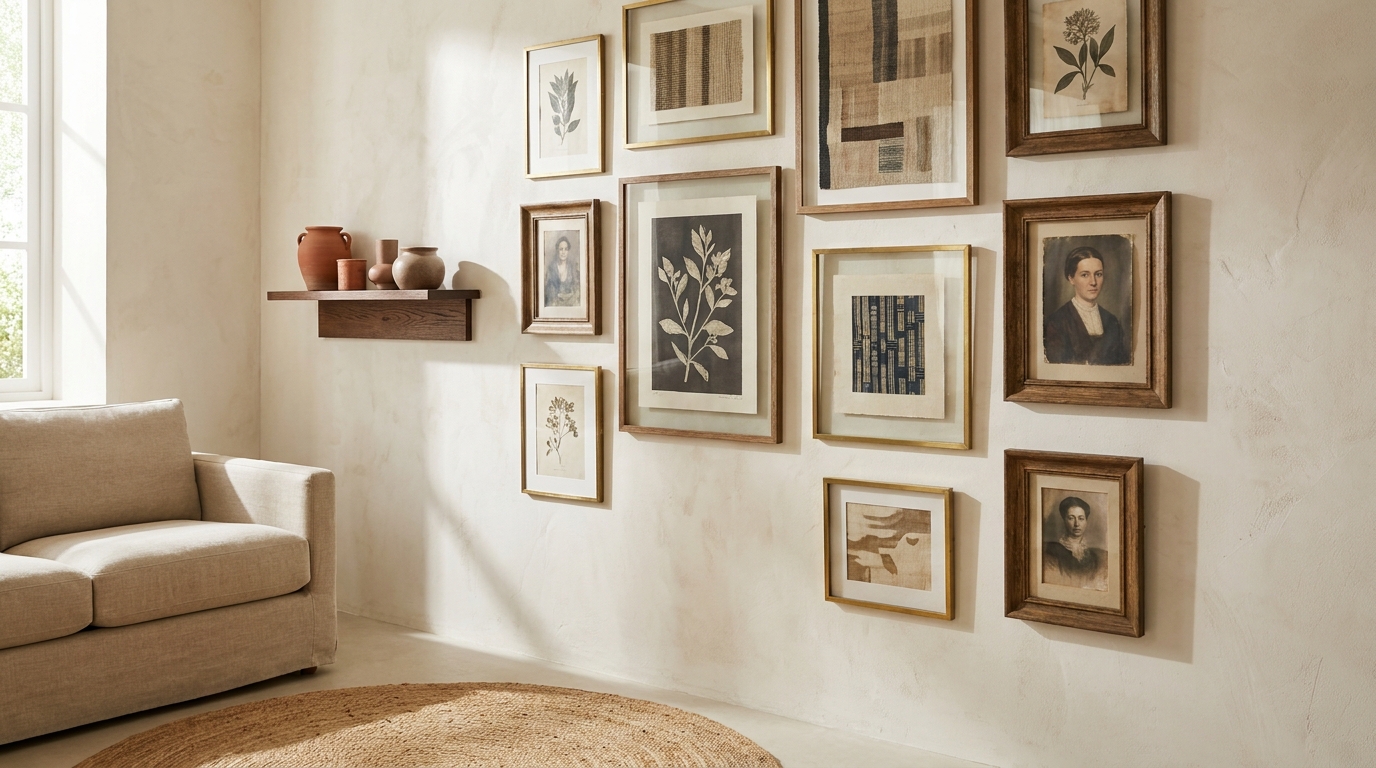
Most design advice says either match all your frames perfectly or mix everything freely. Both extremes cause problems. The real rules are two specific constraints, and once you know them, mixing becomes straightforward. According to Framebridge’s design editorial team, mixed-frame gallery walls now account for 60% of the walls they custom-frame, up from 38% in 2020, which reflects how completely the all-matching aesthetic has shifted (Framebridge Design Guide, 2024).
The counter-intuitive truth about mixing frames is that a wall with deliberately mismatched frames often reads as more sophisticated than a perfectly matched set. Matched frames signal “I bought a set.” Mixed frames signal curation. The difference is whether the mixing follows rules or doesn’t. One all-black frame among warm wood tones feels like a mistake. Two or three black frames spread evenly across the arrangement feels intentional. The brain reads pattern, not chaos.
Rule 1: Match Frame Depth, Mix Finish
This is the rule most people miss. Frame depth is the measurement from the wall surface to the front of the frame profile, typically 0.5 inch to 1.25 inches. When you mix frames with different depths, the frames project different distances from the wall. This creates inconsistent shadow lines at each frame edge. The wall looks like it has random dents and bumps rather than a coherent arrangement.
The fix is simple: stick to one frame depth across your entire wall, even when mixing finishes, metals, and materials. IKEA RIBBA frames have a standard 1.25-inch depth. Most Target Threshold frames run 0.75 to 1 inch. Don’t mix RIBBA with Threshold on the same wall unless you add padding behind the Threshold frames to bring them forward.
Rule 2: Mixing Metal Finishes Is Fine, Mixing Metal Temperatures Is Not
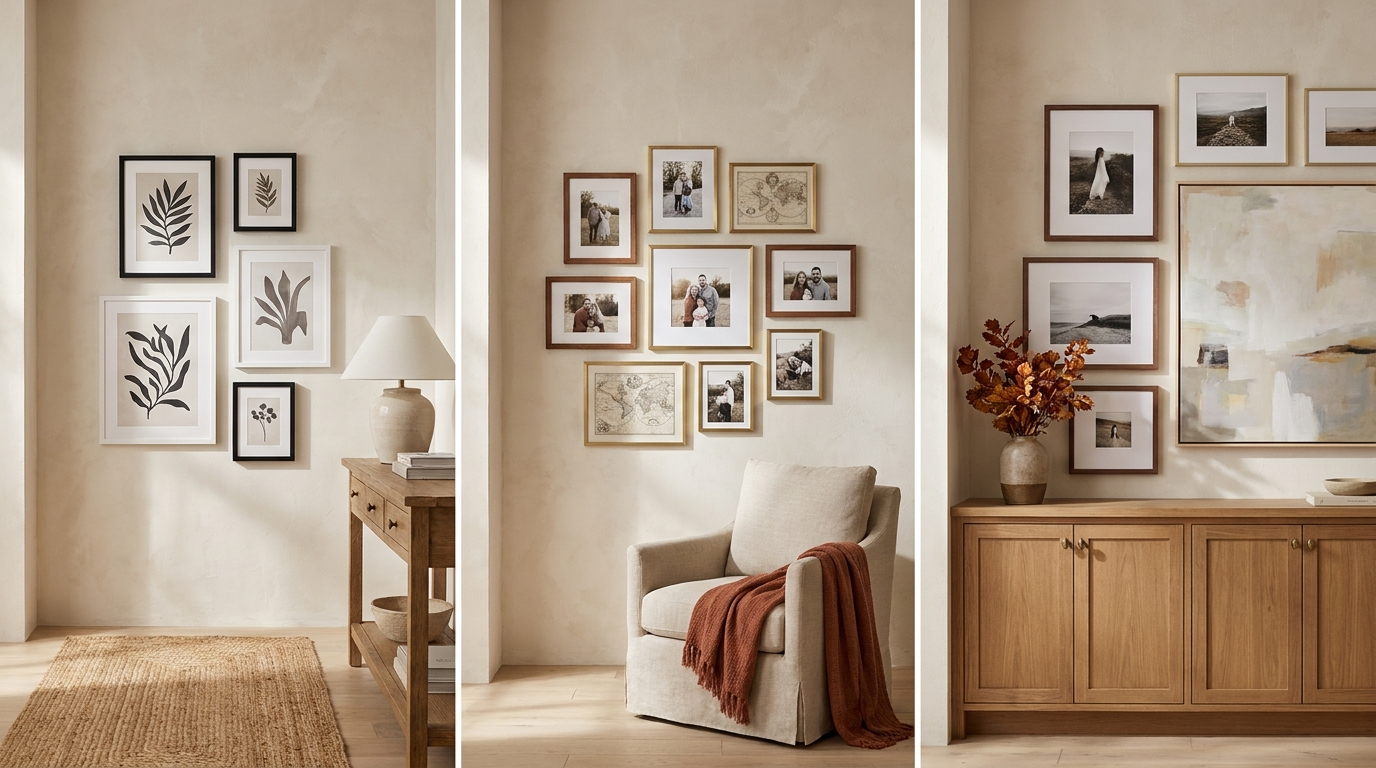
Same-depth frames in gold and matte black work together. Same-depth frames in warm brass and cool chrome fight each other visually. The distinction is color temperature: warm metals (gold, brass, bronze, copper) belong together; cool metals (silver, chrome, brushed nickel) belong together. Mixing within the warm family or within the cool family reads as intentional. Mixing across temperature groups reads as accidental.
Warm wood frames and warm metal frames are natural companions. Cool-toned white or silver frames pair well with cool metal. The color temperature rule applies to the room, too. If your room uses warm-toned textiles and furniture, warm-finish frames reinforce the palette. Cool metal frames in a warm room create low-level visual friction that’s hard to identify but easy to feel.
When to Break Both Rules
A wall with entirely matching frames can feel static. One intentional rule-breaker, a single ornate gold frame in a wall of clean black profiles, or one raw wood frame among matte whites, works as an accent. The key word is one. Two rule-breakers look like errors. One looks like taste.
[INTERNAL-LINK: 35 gallery wall ideas → 35-gallery-wall-ideas-2026-aesthetic]
Should You Use Mats, and What Size?
Matting adds cost but it also adds perceived value to prints. A $15 botanical print inside a 2-inch white mat inside an 11×14 frame reads as gallery-quality. The same print in an 11×14 frame with no mat reads like a poster. The Professional Picture Framers Association estimates that proper matting increases perceived print value by 40 to 60% in consumer surveys, which is why museums and galleries mat virtually everything they display (PPFA Industry Survey, 2023).
Standard Mat Reveal Sizes
1.5-inch reveal: The casual standard. Works for family photos, everyday art, and frames where you want the image to fill most of the frame. Most pre-cut mats sold at Michael’s and IKEA use this reveal. It looks clean and modern.
2-inch reveal: The gallery standard. This is what you see in professional framers and fine art galleries. It makes the print look more deliberate and adds visible breathing room around the image. For prints you care about, the extra half-inch of mat makes a real difference.
Unequal mat reveals: Some framers deliberately make the bottom mat slightly wider than the top and sides, typically 2.5 inches bottom versus 2 inches on three sides. This is an optical correction borrowed from classical framing: the eye reads equal mats as slightly top-heavy, so a heavier bottom mat creates the appearance of balance.
Cost Impact of Matting
Adding a pre-cut mat to a standard frame adds $3 to $8 at the budget end. Custom-cut mats from a professional framer run $15 to $35 per frame depending on size and material. For a gallery wall of 8 to 12 frames, custom matting can add $120 to $300 to the total budget. The alternative is buying frames that include pre-cut mats (most IKEA RIBBA frames do) or purchasing mat boards from online suppliers and trimming them yourself with a mat cutter ($25 to $45 for a basic blade cutter).
What Are the Best Gallery Wall Frames at Each Budget?
The gallery wall frame market splits cleanly into three tiers. Framebridge’s 2024 customer data shows the most common budget for a 6 to 10 frame gallery wall is $80 to $200, with roughly 30% of buyers upgrading to mid-tier frames after regretting initial budget picks (Framebridge Design Guide, 2024). Knowing what each tier actually delivers prevents that regret.
Budget Tier: $6 to $40 Per Frame
IKEA RIBBA (): The RIBBA 8×10 is $6.99. The 16×20 runs $14.99. These are MDF frames with a clean, slightly beveled profile that reads as simple and modern. They include a pre-cut mat and are designed to be hung horizontally or vertically. The glass is basic, not UV-protective, which means prints can fade in direct sunlight over several years. The depth is 1.25 inches, which is consistent across the RIBBA range, making them easy to mix within the line. For a first gallery wall or a rental space you don’t want to over-invest in, RIBBA is hard to beat on value.
Amazon Basics Frame Sets (): The 6-pack sets run $25 to $40 depending on size configuration (typically a mix of 4×6, 5×7, and 8×10). These work well for the small-frame fill role in a 1-2-3 hierarchy. Quality is variable: some sets have noticeable color variation between frames in the same box. Buy from a seller with a solid return policy and check the frames carefully on arrival. The MDF construction and thin profiles make them lightweight and easy to hang with adhesive strips.
Mid-Tier: $15 to $65 Per Frame
Target Threshold (): Threshold frames at Target run $15 to $35 for an 8×10, depending on the finish and profile width. The Threshold Studio McGee Collection extends to $45 to $65 for statement sizes with thicker profiles and better glass. The solid wood frames in this line are worth the premium over the MDF versions: they feel substantial, hold a screw-type picture hook firmly, and have better frame-to-mat color matching than RIBBA. Available in warm oak veneer, matte black, antique white, and a few seasonal finishes. Inconsistency between store batches is the main complaint, so buy all your frames in one purchase if possible.
Pottery Barn Basic Frame (): The Basic frame line at Pottery Barn runs $35 to $65 for an 8×10 depending on size and finish. The wood quality and finish are noticeably better than Target, and the mat reveal is a true 2-inch gallery standard. If you’re building a wall in a main living space where quality shows, the Pottery Barn Basic frames justify the price over RIBBA. The frames are heavier than MDF alternatives. Use proper picture hooks rated for 15+ pounds for the larger sizes.
Investment Tier: $60 to $180 Per Frame
Framebridge (): Framebridge custom-frames individual prints starting around $60 for an 8×10 and running to $150 or more for large formats. The frames are moulded to the exact print dimensions rather than the other way around. You can specify mat width, mat color, UV-protective glazing, and frame profile. For prints you genuinely care about, prints you’ve had made from film photography or fine art prints with limited print runs, the custom approach protects the work and looks significantly better than off-the-shelf. Framebridge ships framed artwork ready to hang, which removes the fiddly assembly step entirely.
Artifact Uprising (): Artifact Uprising specializes in handcrafted wood frames starting around $80 for smaller sizes and climbing to $180 for large-format work. They use sustainably sourced wood and offer several natural finishes not found in standard retail. Their quality control is among the best in the consumer framing market. The frames feel like fine furniture, not wall decoration. Best for heirloom prints, wedding photography, or art you intend to keep for decades. Not a practical choice for a full 10-frame gallery wall, but worth the investment for two or three anchor pieces.
[INTERNAL-LINK: aesthetic bedroom for bedroom frames → aesthetic-bedroom-ideas-2026-complete-guide]
Does Frame Weight and Projection Actually Matter for Hanging?
Frame weight determines what hanging hardware you need, and hanging hardware determines whether your gallery wall stays on the wall. The National Home Safety Council estimates that improper picture hanging causes over 140,000 home injuries annually in the US, the majority from frames falling due to undersized hardware or adhesive strips used beyond their weight rating (National Home Safety Council, 2022). Most adhesive strip failures happen not because the strip is weak but because the frame exceeds its rated weight.
Hardware Ratings by Frame Type
Up to 1 lb (small MDF frames, 4×6 to 5×7): Large Command strips handle this range. One strip per corner, following the application instructions precisely. Let the adhesive set for 72 hours before hanging in humid conditions.
1 to 5 lbs (MDF 8×10 to 11×14, light wood frames): Use sawtooth hangers or D-rings with a wire. A standard picture hook with a small nail holds 5 lbs on drywall. For plaster walls, use a screw and wall anchor instead.
5 to 15 lbs (solid wood 11×14 to 16×20, metal frames): D-ring with braided picture wire and a screw-in picture hook rated for 15+ lbs. On drywall, hit a stud when possible. If no stud is available, use a toggle bolt.
Over 15 lbs (large solid wood, custom frames): Stud mount or toggle bolt required. For a 16×20 solid wood frame with glass, you’re potentially looking at 4 to 6 lbs of frame plus the weight of the glazing. Always check the frame’s actual weight on a kitchen scale before selecting hardware.
Frame Projection and Shadow Consistency
Frame projection, the distance the frame sits away from the wall surface, affects how shadows read across your gallery wall. This is the depth issue mentioned in the mixing section. A 1.25-inch-deep RIBBA sitting next to a 0.75-inch-deep Threshold frame creates a 0.5-inch difference in shadow depth. At close range this looks intentional. Viewed from across a room, it looks like one frame is crooked or raised on a bump in the wall.
For a clean wall appearance, keep frame projection within 0.25 inches across the entire arrangement. If you need to mix frames with different depths, add a thin felt or foam spacer behind the shallower frame to bring it forward. Adhesive foam weatherstripping in 0.125-inch thickness, sold in the door hardware section of hardware stores, works perfectly for this.
How Do You Unify Mismatched Frames?
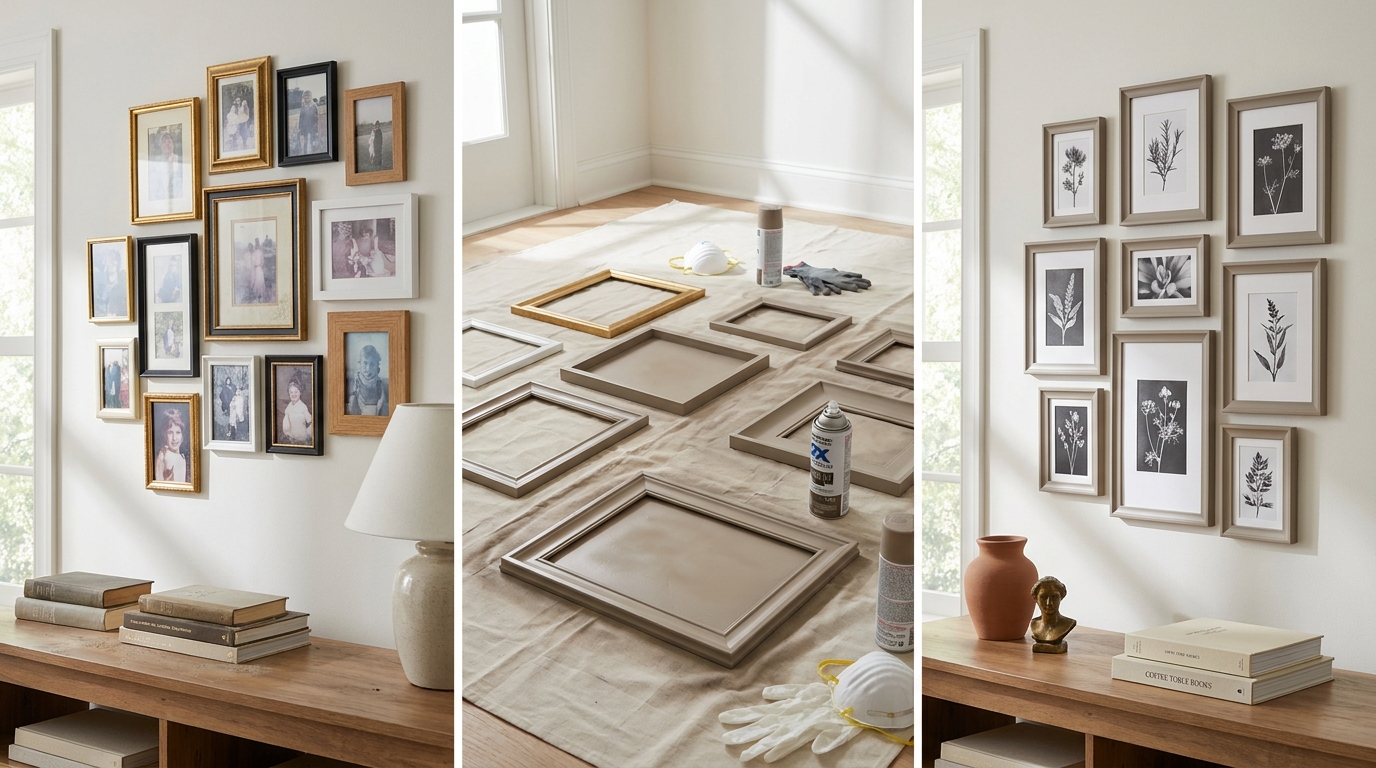
You inherit frames from three different sources, buy two at a thrift store, and pull another set from storage. Now they’re all slightly different finishes, depths, and materials. Starting over is expensive. The spray paint unification technique costs under $20 and takes an afternoon.
Framebridge’s editorial notes that a consistent painted finish is the most-used professional technique for cohering a mixed collection, used in nearly 45% of styled gallery walls that start with existing frames rather than purpose-bought sets (Framebridge Design Guide, 2024).
The Spray Paint Unification Technique
Clean every frame surface with a tack cloth or lightly dampened rag. Remove the glass and backing before spraying. Lay frames face-down on cardboard in a well-ventilated area, and spray the front face and profiles with a light, even first coat. Don’t flood the surface. One thin coat, let it dry for 20 minutes, then a second thin coat.
Color options: matte black unifies the most mixed collection because it reads as intentional in virtually any room. Warm white and chalk white work for a French country or cottagecore aesthetic. Metallic gold or brushed brass revives frames for a warmer, more eclectic feel.
The best spray paints for frames: Rust-Oleum 2X Ultra Cover in Flat Black ($6 to $8 at hardware stores), Krylon ColorMaxx in Satin White ($7 to $9), and Rust-Oleum Metallic Gold ($8 to $10). Two cans cover approximately 12 to 15 standard frames. Total material cost for a 10-frame unification project: $15 to $20 and about three hours including drying time.
Unifying With Coordinating Mat Colors
When you can’t or don’t want to repaint frames, coordinating mat colors achieve a similar unifying effect. Replace mats across all frames with the same mat color, typically bright white or warm cream. The consistent mat color creates a visual through-line that ties different frame finishes together. This works especially well when your frames are already in the same color family (varied browns, or varied blacks) but differ enough to look slightly off. A consistent cream mat pulls them into a cohesive arrangement even when the frames themselves don’t perfectly match.
[INTERNAL-LINK: how to hang step-by-step → how-to-make-gallery-wall-7-steps]
Frequently Asked Questions
How many frames do you need for a gallery wall?
Most gallery walls use 6 to 12 frames for a typical 6 to 8-foot wall section. The exact number depends on frame sizes and spacing. A standard approach: start with your 1-2-3 hierarchy (one large, two medium, three small) for a 6-frame wall, then add to taste. Framebridge recommends a minimum of 5 frames to avoid a sparse look and a maximum of 15 to 20 for most residential walls before the arrangement becomes visually overwhelming (Framebridge Design Guide, 2024).
[INTERNAL-LINK: layout arrangements → gallery-wall-layout-ideas-20-arrangements]
What is the ideal spacing between gallery wall frames?
Two to three inches between frames is the standard for a cohesive gallery wall. A 2-inch gap feels tighter and more formal. A 3-inch gap feels more relaxed and airy. Anything over 4 inches and the frames start reading as separate hanging pieces rather than a unified arrangement. Keep spacing consistent across the entire wall. Inconsistent spacing is the most common reason a gallery wall looks unfinished even when the frames themselves are good.
Can you mix photo frames with canvas prints on a gallery wall?
Yes, but canvas prints project further from the wall than framed pieces, typically 1 to 1.5 inches for a standard stretched canvas versus 0.5 to 1.25 inches for a frame. This creates depth variation that can work if used intentionally, placing the canvas as the clear anchor piece, or it can look accidental if the canvas sits among equally-sized framed pieces. Using one canvas as the largest anchor and framing everything else avoids the depth conflict entirely.
Should gallery wall frames all be the same color?
No. Matching color is one approach but not the only effective one. A mixed-metal arrangement following the depth and color-temperature rules described above reads as sophisticated rather than chaotic. The most important consistency rule is frame depth, not color. Matching depth gives the wall a unified shadow line. Matching color is optional.
What finish is best for gallery wall frames in a bedroom?
Warm wood tones (oak, walnut, natural wood) and matte black are the two most versatile finishes for bedroom gallery walls. Warm wood reinforces a cozy, organic aesthetic. Matte black creates contrast against light walls and reads as modern. Bright chrome or cool silver feels more appropriate in a bathroom or home office. For a bedroom wall, stick to finishes with low reflectivity. Glossy frames pick up light from lamps and windows in ways that become distracting in a space designed for rest.
Putting It All Together
Gallery wall frames are not complicated, but they do follow rules. Start with the 1-2-3 sizing hierarchy. Choose your anchor size based on wall width. Match frame depths across the arrangement. Keep metal finishes within the same color temperature family. Decide whether to mat based on print quality and the impression you want. Pick a budget tier that matches how long you’ll live with the wall.
The spray paint technique is worth knowing even if you don’t need it now. Tastes change, rooms change, and a $12 can of paint can turn a thrift store score into an intentional design element. The most expensive approach isn’t always the best one. A wall of unified IKEA RIBBA frames with high-quality prints inside them will outperform a wall of expensive frames holding mediocre art every time.
[INTERNAL-LINK: complete gallery wall guide → gallery-wall-ideas-2026-complete-guide]
The DecorNote Team covers home decor and wall art for renters and first-time homeowners. Product prices reflect current retail as of May 2026 and may vary by retailer. Affiliate links help support the site at no extra cost to you.