You signed a lease that promises a deposit refund only if walls remain “as received.” You also have a stack of framed prints, that sunny corner above the sofa, and zero patience for spackle. Good news: you can build a full gallery wall without nails, hammers, or drilled anchors—and it can look just as polished as anything Pinterest serves up.
This guide walks through ten renter-tested methods, weight limits, surface compatibility, and a step-by-step process for laying out your arrangement before anything touches the wall. Whether you’re hanging a single 24×36 print or a 12-frame salon-style wall, there’s a damage-free path here for you.
Key Takeaways
- Command Strips (Picture Hanging Strips) hold up to 16 lbs per pair and remain the most reliable no-nail option for framed art on painted drywall.
- Picture ledges with removable adhesive mounts let you swap art whenever you want—no commitment, no holes.
- Washi tape, magnetic systems, and adhesive hooks each solve a different problem; matching the method to your frame weight and wall surface is what makes a gallery wall last.
- Always clean the wall with isopropyl alcohol, let it dry fully, and wait 1 hour after applying adhesive strips before hanging artwork. Skipping this step is the #1 reason strips fail.
- Lay out your full arrangement on the floor first, then trace each frame on kraft paper to use as wall templates.
Why “No Nails” Matters More Than Ever
The average US renter moves every 2.5 years, and security deposits frequently include line items for “wall damage repair.” A single quarter-inch nail hole can trigger a $25 to $75 patch-and-paint charge depending on the building. Multiply that by a 9-frame gallery wall and you’re looking at real money lost to decoration.
Beyond the financial argument, nail-free methods give you flexibility renters crave: you can reshuffle art on a Sunday afternoon, test placements without commitment, and take everything down in under an hour on moving day.
The 10 Best Methods for a Gallery Wall Without Nails
1. Command Picture Hanging Strips (Best Overall)
3M’s Command Picture Hanging Strips are the workhorse of damage-free art display. The Velcro-style strips come in pairs—one half adheres to your frame, the other to the wall, and they click together.
Weight limits: Small strips hold 4 lbs (1 set), medium hold 6 lbs (1 set), and large hold 16 lbs (4 sets per frame). Always round up if your frame falls between sizes.
Best for: Framed prints, canvas art, and lightweight metal frames on smooth painted drywall.
Pro tip: Press each strip firmly for 30 seconds, attach the frame, then remove it for 1 hour before re-hanging. The wait time activates the adhesive’s full bond strength—skip it and your art will end up on the floor by week’s end.
2. Picture Ledges with Adhesive Mounts
A floating ledge (sometimes called a picture rail or shelf) is the no-commitment hero of renter decor. Mount a single 24- to 48-inch ledge using heavy-duty adhesive brackets, then lean frames against the wall in any configuration you want.
Why renters love them: Swap art seasonally, layer overlapping frames for depth, and mix in small plants or ceramics for texture.
Weight tip: Use adhesive mounting hardware rated for at least 2x your expected ledge load. A standard 36-inch wood ledge typically weighs 3 to 5 lbs empty.
3. Adhesive Picture Hooks
Unlike Command Strips, adhesive hooks attach to the wall with a hook protruding outward—you then hang your frame by its wire or D-ring just like a traditional nail. Aweshock and similar brands rate their hooks for 11 to 17 lbs each.
Best for: Frames with existing wire hangers and walls where you want the option to bump a frame slightly left or right without re-sticking adhesive.
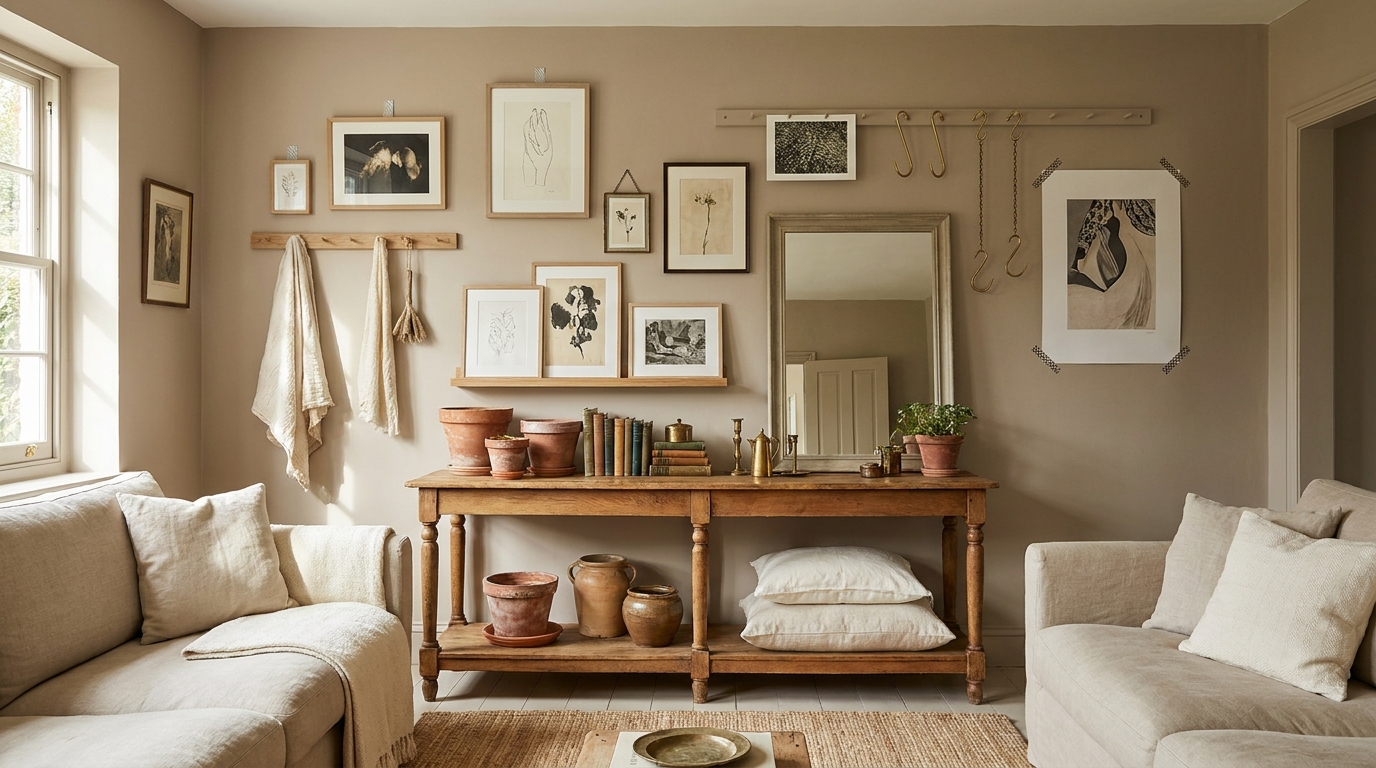
4. Picture Rail Molding (If Your Apartment Has It)
Many pre-war buildings still have picture rail molding running 10 to 18 inches below the ceiling. Hook S-shaped picture rail hangers over the rail and suspend frames from decorative cord, chain, or ribbon.
Aesthetic bonus: This is the most architectural-looking option and pairs beautifully with traditional and transitional decor styles.
5. Washi Tape Frames
For poster-weight prints (no frame, or only a lightweight foam-core mount), washi tape creates an Instagram-ready border. Available in hundreds of patterns, washi tape removes cleanly from paint and can act as both the “frame” and the adhesive.
Best for: Renters who change art frequently, dorms, and unframed prints under 11×17.
6. Magnetic Hanging Systems
Adhesive-backed magnetic discs (such as those from MagPic or similar brands) stick to the wall, and a corresponding magnet attaches to your frame. Lifting and re-positioning takes seconds.
Weight range: 3 to 8 lbs per magnet set. Best for small to medium frames.
7. Tension Rods and Hanging Cord
A tension rod between two walls (or inside a window frame) creates an instant hanging bar. Suspend lightweight prints with binder clips, mini clothespins, or S-hooks attached to twine.
Best for: Narrow walls, hallway galleries, and rotating displays of children’s art or photographs.
8. Velcro Hook-and-Loop Strips (Industrial Strength)
For heavier framed pieces (up to 10 lbs), industrial-strength Velcro from brands like Velcro Brand Industrial Strength provides a re-positionable bond. One adhesive side attaches to the wall, the other to the frame back.
Caution: These can pull paint if removed incorrectly. Always pull straight down slowly, never out at an angle.
9. Poster Putty and Adhesive Putty
For very lightweight items (postcards, small prints under 1 lb), poster putty works on textured and painted surfaces. Roll a small pea-sized ball, press to all four corners, and apply to the wall.
Limitations: Not for framed glass art. May leave oil marks on porous paints over time.
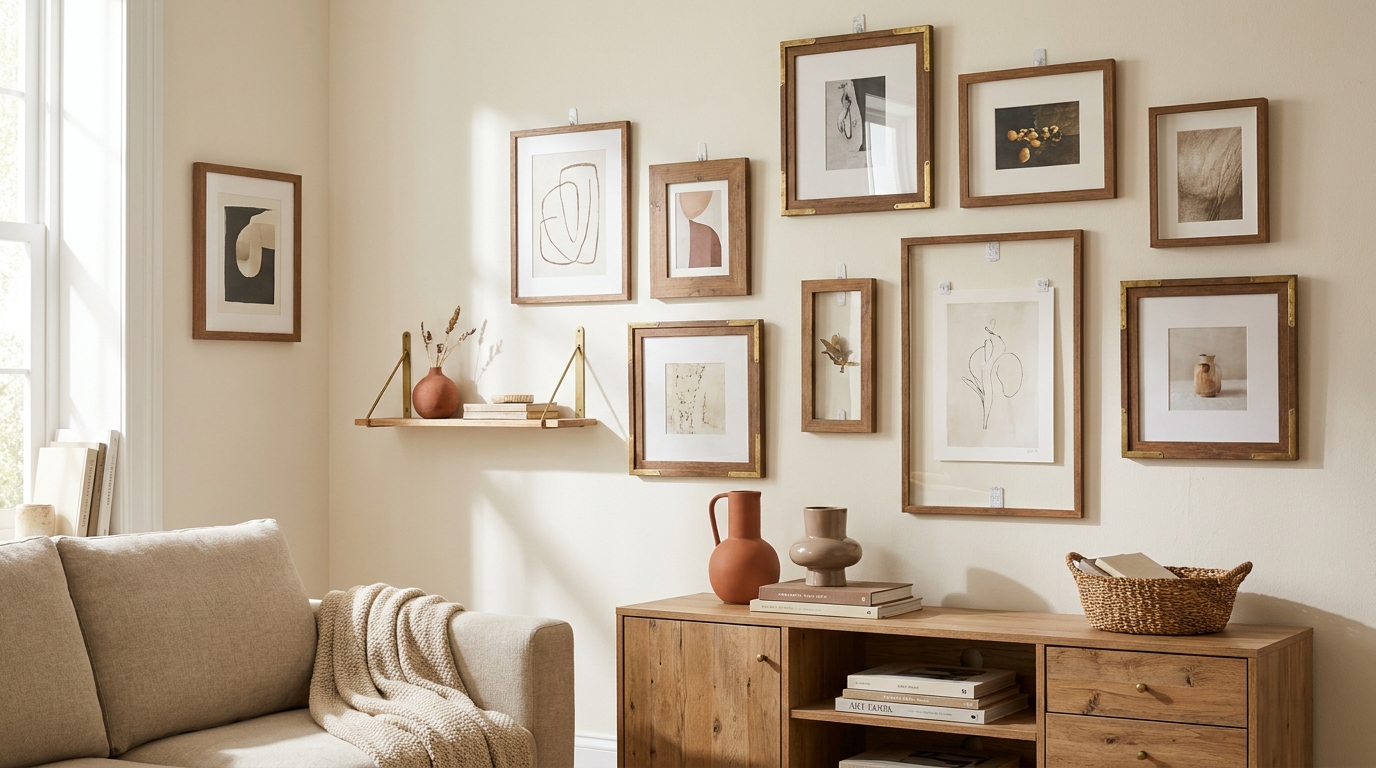
10. Leaning and Layering
The easiest method requires no adhesive at all: lean larger frames directly against the wall on a console, mantel, dresser, or floor. Layer smaller frames in front of larger ones for a curated, designer-favored look.
Best for: Statement pieces over 24 inches and renters in buildings with strict “no adhesive of any kind” clauses.
Weight Limits at a Glance
| Method | Weight Limit | Best Surface | Removability |
|---|---|---|---|
| Command Picture Strips (Large) | 16 lbs/set | Smooth painted drywall | Excellent |
| Adhesive Picture Hooks | 11–17 lbs | Painted drywall, glossy | Very good |
| Picture Rail Hangers | 30+ lbs | Picture rail molding | Excellent |
| Magnetic Adhesive Discs | 3–8 lbs | Smooth painted walls | Excellent |
| Industrial Velcro | 10 lbs | Smooth painted drywall | Good (use care) |
| Washi Tape | 1–2 lbs | Painted drywall | Excellent |
| Poster Putty | Under 1 lb | Most surfaces | Excellent |
How to Plan Your Gallery Wall Layout (Before Anything Touches the Wall)
The biggest mistake renters make isn’t choosing the wrong adhesive—it’s hanging art crooked or unevenly spaced because they skipped the planning phase. Here’s the process designers use:
Step 1: Gather and Measure Every Frame
Lay all your art on the floor in front of the target wall. Measure each frame’s exact width and height, and note where the hanging hardware sits (wire vs. D-ring vs. sawtooth).
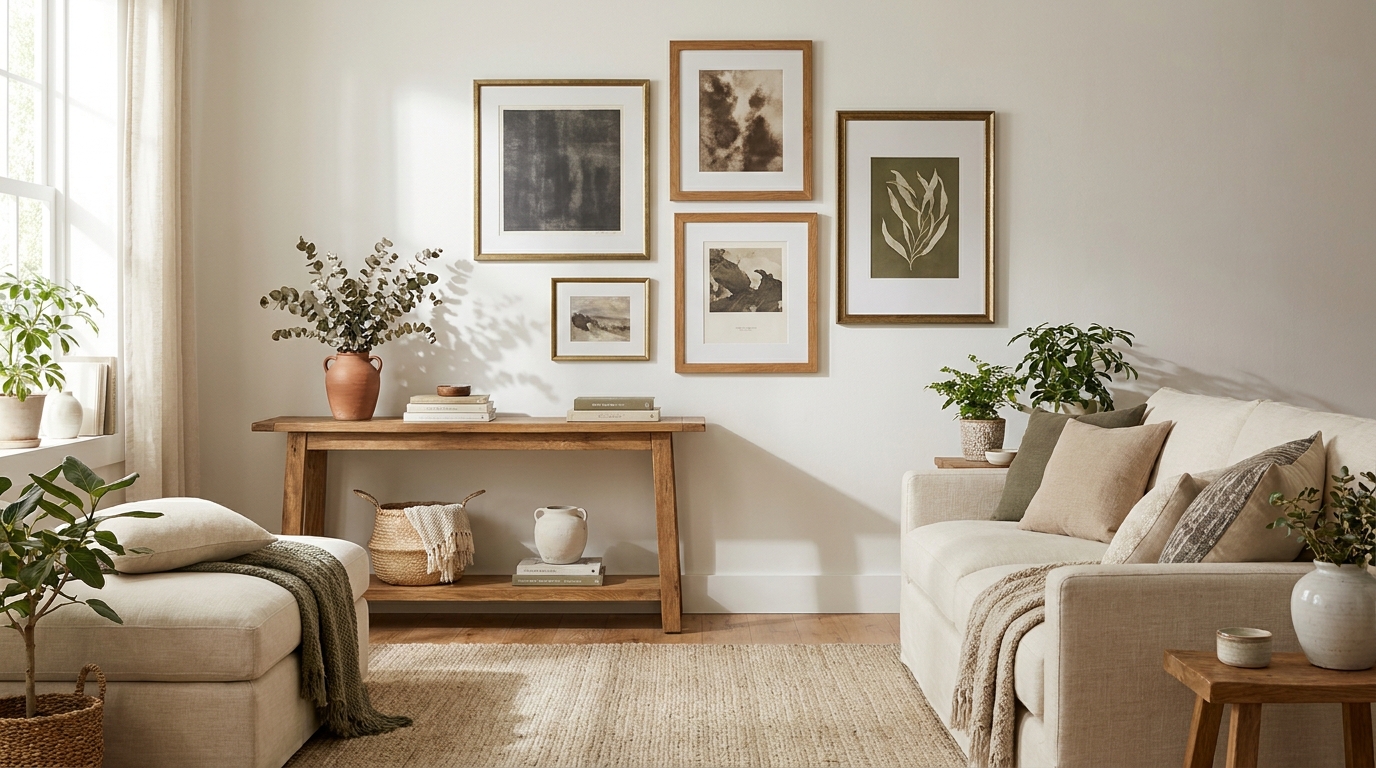
Step 2: Choose a Layout Style
Three popular configurations work for nearly any space:
- Salon style: Asymmetric, varied frame sizes clustered closely (1 to 2 inches apart). Best for 6 to 12 frames and creative, eclectic rooms.
- Grid: Uniform frame sizes spaced evenly (typically 2 to 3 inches apart). Best for matched sets of prints and modern, minimal rooms.
- Linear: Single horizontal or vertical row, evenly spaced. Best for hallways, above sofas, and narrow walls.
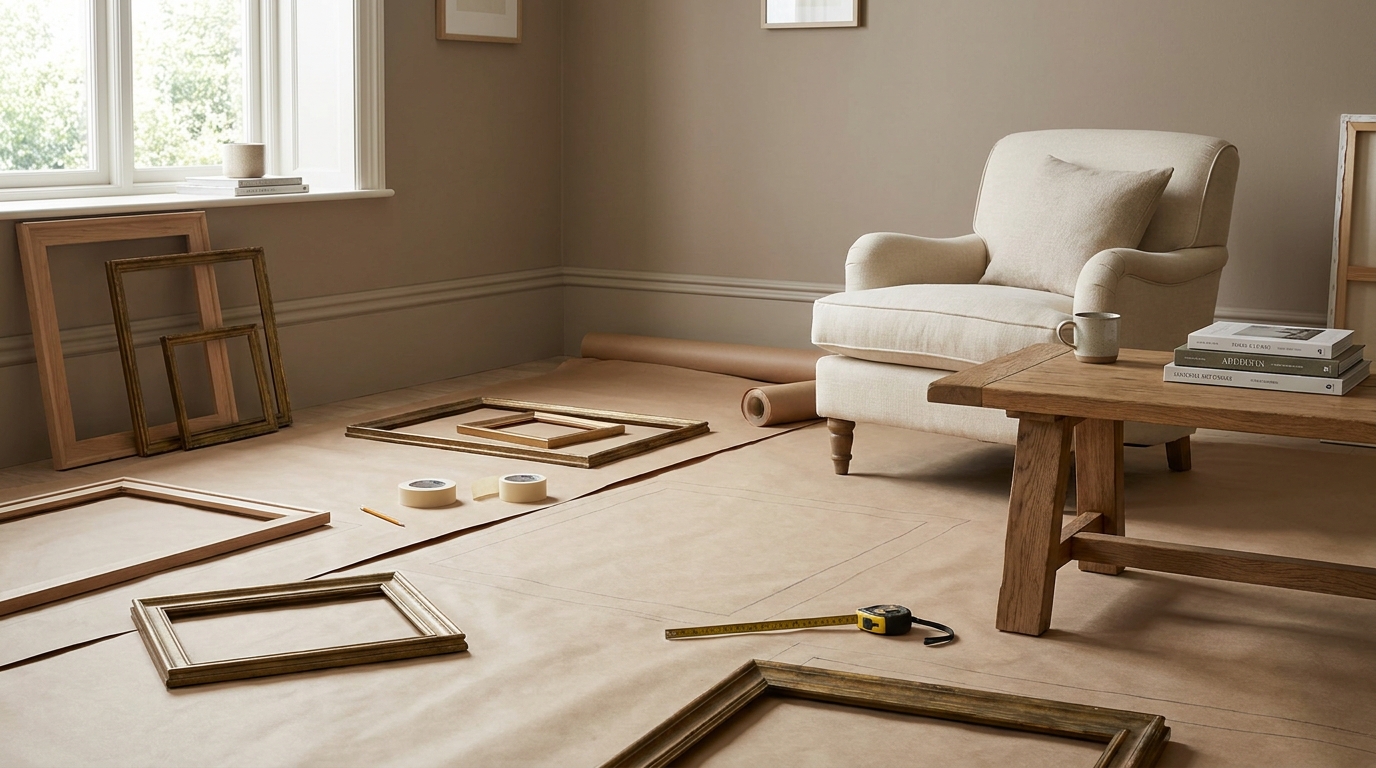
Step 3: Trace and Tape
Trace each frame on kraft paper or newsprint. Mark the hanging point on the back of each paper template. Then tape the templates to the wall with painter’s tape and rearrange until the composition feels balanced. This is the single highest-impact step in the entire process.
Step 4: Mark Adhesive Points
With templates in place, mark a small painter’s tape “X” through the paper at each hanging point. Remove the paper. Your adhesive points are now visible.
Step 5: Prep the Wall
Wipe each adhesive point with isopropyl alcohol (70% or higher) on a clean cloth. Let dry for 5 minutes. Skip soap-based cleaners—residue weakens the bond.
Step 6: Apply Adhesive and Hang
Follow your chosen method’s instructions exactly. For Command Strips, press for 30 seconds, attach the frame, then remove and wait 1 hour before re-hanging.
Common Mistakes That Wreck No-Nail Gallery Walls
After years of testing renter-friendly methods, the same five mistakes keep frames on the floor:
-
Skipping the alcohol wipe. Dust and skin oils prevent adhesive from bonding fully. This causes 60% of strip failures.
-
Hanging immediately after application. Most adhesive strips need 30 to 60 minutes to cure. Hang too soon and the weight pulls the strip off the wall.
-
Choosing weight limits too close to your frame’s weight. Always round up. A 6-lb frame should use a strip rated for 10+ lbs.
-
Applying to textured walls. Knockdown, popcorn, or heavily textured walls reduce adhesive contact by up to 70%. Lean and layer instead.
-
Removing strips by pulling outward. Always pull the release tab straight down along the wall surface—never away from the wall.
Wall Surface Compatibility
Not all walls play nicely with adhesive products. Here’s what works where:
- Smooth painted drywall: All methods work. This is the gold standard.
- Eggshell or satin finish: All adhesive methods work well.
- Flat or matte paint: Adhesives may pull paint on removal. Test in a hidden spot first.
- Glossy or semi-gloss: Excellent adhesion. Top performer.
- Wallpaper: Generally avoid all adhesives. Use leaning, picture rails, or tension rods.
- Brick or concrete: Use construction-grade adhesive hooks (rated for masonry) or lean only.
- Textured drywall (orange peel, knockdown): Limited adhesive options. Lean, layer, or use heavy-duty hooks designed for texture.
Building Your First Gallery Wall: A 6-Frame Example
Let’s walk through a realistic project. You have a 6-foot-wide wall above a sofa and six framed prints ranging from 8×10 to 16×20.
-
Plan a salon-style layout with the 16×20 anchor frame slightly left of center.
-
Trace each frame on kraft paper. Total tracing time: 15 minutes.
-
Tape templates to the wall, leaving 2 inches between frames. Step back, photograph from across the room, and adjust.
-
Wipe each adhesive point with isopropyl alcohol. Total prep time: 10 minutes.
-
Apply Command Large Strips (4 sets) to the 16×20 anchor. Use medium strips (2 sets each) for 11×14 frames and small strips (1 set each) for 8x10s.
-
Press each frame to the wall for 30 seconds, then remove and wait 1 hour.
-
Re-hang all frames. Total project time: under 90 minutes including the cure wait.
When to Skip No-Nail Methods Entirely
A few situations call for traditional hanging—or no wall hanging at all:
- Frames over 20 lbs. Heavy mirrors, large canvases, and shadow boxes exceed most adhesive ratings. Use a picture ledge or lean against the wall.
- High-humidity rooms. Bathrooms and kitchens with steam reduce adhesive lifespan. Magnetic systems and ledges perform better here.
- Buildings with explicit “no adhesive” clauses. Some luxury rentals prohibit any adhesive. Tension rods and leaning are your only options.
FAQ
How much weight can Command Strips actually hold?
Command Picture Hanging Strips (Large) are rated for 16 lbs when four sets are used together on a single frame. For best results, weigh your frame first and round up to the next size category.
Will adhesive strips damage paint when removed?
When applied to fully cured paint (at least 30 days old) and removed correctly—by pulling the release tab straight down along the wall surface—Command Strips remove cleanly. Older paint, flat finishes, or improperly cured paint may peel.
Can I use these methods on textured walls?
Most adhesive methods perform poorly on heavily textured surfaces because they can only contact the high points. For orange-peel or knockdown textures, try heavy-duty adhesive hooks designed for textured surfaces, or stick to leaning and picture-ledge methods.
How do I hang heavy frames without nails?
For frames between 10 and 20 lbs, combine four sets of Command Large Strips or use industrial-strength adhesive hooks rated for the weight. For anything over 20 lbs, switch to a picture ledge or lean the piece against the wall on a console.
How long do Command Strips last?
3M rates their picture hanging strips for “long-term” use, meaning years when properly applied to clean, smooth surfaces. Re-evaluate any adhesive every 12 months in humid environments.
Can I rearrange a gallery wall after I’ve hung it?
Yes—and this is one of the best reasons to skip nails. Most adhesive methods allow you to remove and reapply with fresh strips. Picture ledges let you swap art instantly without any adhesive change at all.
Your Damage-Free Gallery Wall Starts This Weekend
Building a gallery wall without nails isn’t a compromise—it’s an upgrade. You get the flexibility to evolve your space as your taste shifts, the freedom to take everything with you when the lease ends, and the satisfaction of a full deposit returned.
Start with one method, one wall, and six frames. Use Command Strips for the bulk of your art, add a picture ledge for layering and seasonal swaps, and lean your largest piece against the wall as a grounded anchor. Within a single afternoon, you’ll have a gallery wall worth photographing—and not a single hole to patch on move-out day.