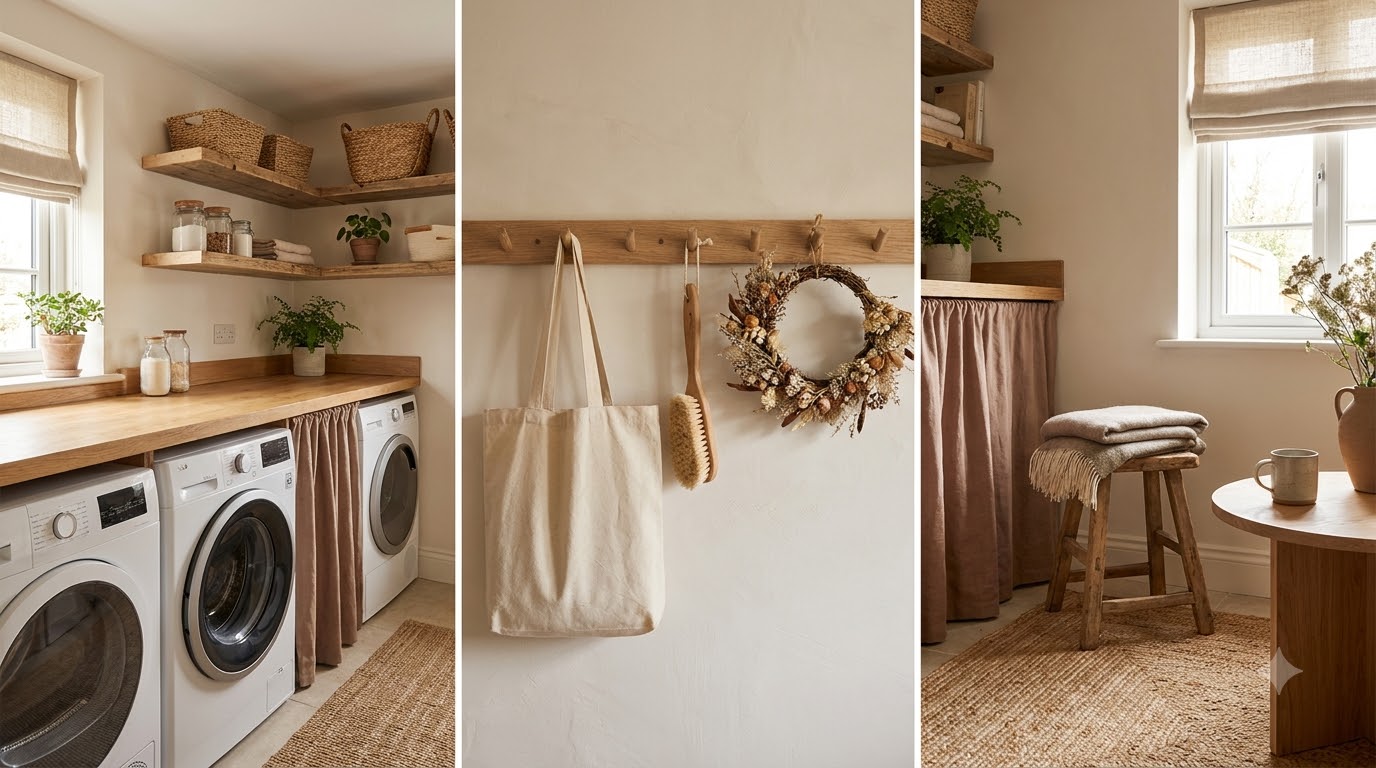
Small Laundry Room Makeover Ideas
Small laundry rooms win the same way every time: send your storage up the wall, put a counter over the machines, add a light you actually enjoy standing under, and mix pretty with functional so the room earns its square footage. That’s the whole playbook. Whether you’re working with a closet-sized nook, a hallway stack, or a corner of the kitchen, you don’t need more floor space. You need to use the vertical air above the machines, keep the folding surface flat and generous, and lean on renter-friendly, no-drill fixes that come right back off the wall when your lease ends. Below, we walk through the exact heights, depths, sizes, and price ranges we reach for, plus the small-space tricks that make a tight laundry feel calm instead of cramped.
Key Takeaways
- Go vertical first: a single over-machine shelf mounted 16 to 24 inches above the appliances reclaims storage you already own.
- Add a counter: a 24- to 25-inch-deep top over front-loaders turns two machines into one folding station.
- Stack to double your floor: a stacking kit ($30 to $60) converts a side-by-side pair into a tower footprint.
- Light it right: one bright, warm-white fixture makes stain-checking and folding faster and the room friendlier.
- Rent smart: tension rods, adhesive hooks, and freestanding shelves deliver a full makeover with zero drilling.
How do you make a small laundry room functional?
You make a small laundry room functional by giving every task a home. In a tight space, function is really about zones: a place to sort dirty clothes, a place to store detergent and supplies, a flat surface to fold on, and somewhere to hang the things that can’t go in the dryer. When we first tackled our own galley-width laundry closet, the problem wasn’t square footage at all. It was that clean towels, half-empty detergent bottles, and a rogue pile of “hand wash only” shirts were all competing for the same two feet of counter. Assigning each one a dedicated zone fixed the chaos overnight.
Start by mapping your space into four working zones, then solve them one at a time:
- Sort zone: a slim rolling cart or a two-section hamper (lights and darks) tucked beside or under the machines.
- Supply zone: one shelf or cabinet, 24 inches wide, holding detergent, dryer sheets, and stain spray.
- Fold zone: a flat counter or a fold-down surface at least 24 inches deep.
- Dry zone: a wall-mounted or over-door rack for air-drying delicates.
Once each zone has a physical spot, the room runs itself. If you’re squeezing laundry into a hallway or closet, the same zoning logic we use in our small apartment storage ideas applies here: contain, stack, and go vertical before you ever consider giving up floor space.
How do you add storage in a tiny laundry?
You add storage in a tiny laundry by building upward and outward from the machines instead of across the floor. The single biggest gain is the empty wall above your appliances. Most standard washers and dryers sit around 36 to 39 inches tall, which leaves several feet of unused vertical space between the top of the machine and the ceiling. That’s prime real estate for shelves, cabinets, or a hanging rod.
Here are the storage moves we reach for most, roughly in order of how much they give back:
- Over-machine open shelf: mount the first shelf 16 to 24 inches above the appliances so lids and doors still open; add a second shelf 12 to 15 inches above that.
- The between-machine gap: a slim 5- to 7-inch-wide rolling cart slides into the space beside a machine and hides detergent and cleaning supplies.
- Over-the-door rack: hooks the top of the laundry-room or closet door and holds a drying rack, ironing board, or supply caddy.
- Tension-rod hanging bar: spanned across a nook, it becomes an instant closet rod for shirts straight out of the dryer.
- Stacked bins or a cube unit: a 2-by-2 cube shelf gives you four labeled cubbies for socks, rags, and overflow.
When you’re mounting a shelf yourself, keep tools stored 15 to 24 inches above the counter surface so they’re within reach but not in your folding way. And if you rent, skip the studs entirely (more on that below).
Add a counter over the machines
A counter is the upgrade people notice first, and it’s often the cheapest transformation you can make. Front-loading washers and dryers are typically 24 to 34 inches deep, so a countertop in the 24- to 25-inch depth range sits flush over the pair and gives you a continuous folding surface. Suddenly two appliances become one uninterrupted work table.
Your counter options, from most to least budget-friendly:
- A pre-cut laminate counter ($40 to $90): lightweight, wipeable, and easy to trim to a 24- to 25-inch depth.
- A stained pine board or butcher-block offcut ($30 to $70): warm, sturdy, and renter-friendly when simply set on top.
- A wall-mounted fold-down shelf ($25 to $60): perfect when the machines are top-loaders and you can’t cover the lids.
- A slim console table straddling the machines ($50 to $120): zero installation and instant storage underneath.
For top-loaders, the counter goes on the wall next to the machines rather than over them, or you switch to that fold-down shelf so lids stay clear. We added a butcher-block top over our front-loaders for about $55 and it instantly became the most-used surface in the whole apartment, doubling as a spot to set groceries and repot herbs.
Stack, or plan your machines smartly
If your machines sit side by side and you’re starved for floor space, stacking is the highest-impact change available. A stacking kit (the bracket that safely locks a dryer on top of a front-load washer) runs $30 to $60 and turns a roughly 54-inch-wide footprint into a 27- to 30-inch-wide tower. That freed-up width is often enough to add a slim cabinet, a hamper, or a narrow drying station.
A quick reality check before you stack:
- Stacking works only with front-loading machines, and the kit should match your specific brand and model.
- A stacked tower reaches about 70 to 80 inches tall, so confirm your ceiling and any upper shelves leave clearance.
- Leave 1 inch of breathing room on each side for airflow and vibration.
- If you can’t stack, park a rolling cart between the machines and go vertical with shelving instead.
Compact all-in-one washer-dryer combos are another route for the very tightest nooks, occupying a single 24-inch-wide slot. They wash and dry in one drum, which is slower but frees enormous space in a studio.
Drying racks that fit small spaces
Air-drying is where small laundries quietly fall apart, because a sprawling floor rack eats the little space you have. The fix is to dry vertically or fold the rack flat when you’re done. We keep a wall-mounted accordion rack by the machines and pull it out only on wash day, then collapse it against the wall the rest of the week.
Match the rack to your space:
- Wall-mounted accordion rack: extends 20 to 30 inches from the wall, folds to about 3 inches deep, holds a full load.
- Over-the-door rack: adds 6 to 10 hanging bars using zero floor space.
- Tension-rod bar: spans a nook at any height for hanging shirts and dresses on hangers.
- Compact folding floor rack: look for a 24-by-14-inch footprint that tucks between the machine and the wall.
- Retractable clothesline: mounts on two opposite walls and disappears when retracted.
The renter’s no-drill makeover
Renting doesn’t mean settling for a sad, gray laundry corner. Nearly every upgrade above has a no-drill version, and that’s exactly how we’ve styled three rentals in a row without losing a deposit. The trick is choosing fixtures that grip by tension, adhesion, or gravity instead of screws.
Our go-to renter toolkit:
- Tension rods for hanging bars and under-shelf curtains that hide the machines’ guts.
- Heavy-duty adhesive hooks (rated for 3 to 7.5 pounds each) for drying racks, brushes, and supply caddies.
- Freestanding over-the-washer shelving units that bridge the machines with legs on the floor, no wall anchors needed.
- Peel-and-stick backsplash tile ($15 to $25 for a small run) to add pattern and wipe-clean protection.
- A patterned washable rug to soften the floor and warm the whole room instantly.
These same removable tactics carry over anywhere space is tight; we lean on them constantly in our small apartment decor ideas and again in our broader small space storage ideas. A laundry nook is just one more surface to treat gently and style boldly.
Laundry zones, solutions, and price at a glance
| Laundry Zone | Small-Space Solution | Typical Price |
|---|---|---|
| Above the machines | Open shelf mounted 16–24 in. up | $20–$50 |
| Folding surface | 24–25 in. deep counter or board | $30–$90 |
| Floor footprint | Stacking kit for front-loaders | $30–$60 |
| Supplies | Slim 5–7 in. rolling cart | $25–$45 |
| Air-drying | Wall-mounted accordion rack | $25–$55 |
| Renter walls | Adhesive hooks + tension rods | $10–$30 |
| Style layer | Peel-and-stick tile + washable rug | $30–$70 |
Make it pretty, not just practical
The pretty-functional mix is what separates a makeover from a mere reorganization. Once the storage and surfaces are handled, a few styling touches make the room somewhere you don’t mind spending time. The goal is a space that looks intentional even though it’s tiny.
Five finishing touches we come back to every time:
- Decant detergent into two or three matching glass jars or dispensers for an instant tidy look.
- Swap the lightbulb to a warm-white 2700K to 3000K bulb so the room feels soft, not clinical.
- Add one plant that likes humidity, like a pothos, on the new counter or top shelf.
- Hang a small piece of art or a framed print with an adhesive strip to draw the eye up.
- Label your bins so the system stays intact and everything looks deliberate.
If your laundry doubles as a drop zone near the door, borrow a few hooks-and-bench tricks from our mudroom entryway ideas so the space works twice as hard. A humble laundry nook and a busy entryway share the same DNA: contain the mess, go vertical, and make it look good on the way out.
Frequently Asked Questions
How high should a shelf be above a washer and dryer?
Mount your first shelf 16 to 24 inches above the machines so front-loader doors and top-loader lids open fully without hitting it. If you’re adding a second shelf, space it 12 to 15 inches above the first. That keeps everyday supplies within easy reach while leaving room to work.
Can I put a countertop over my washer and dryer?
Yes, over front-loaders. Choose a 24- to 25-inch-deep counter to match the machines’ depth and simply set it on top for a rental, or secure it if you own. For top-loading machines, mount a fold-down shelf or place the counter on an adjacent wall so the lids stay clear.
How can renters upgrade a laundry room without drilling?
Lean on tension rods, heavy-duty adhesive hooks rated for 3 to 7.5 pounds, freestanding over-washer shelving, peel-and-stick tile, and a washable rug. Every one of these adds storage or style without a single screw hole, so they come off cleanly at move-out and protect your deposit.
Is it worth stacking a small washer and dryer?
If you have front-loaders and crave floor space, absolutely. A $30 to $60 stacking kit shrinks a 54-inch-wide pair into a 27- to 30-inch tower, freeing room for a cart or cabinet. Confirm your ceiling clears the roughly 70- to 80-inch stacked height first.
What is the best drying rack for a tiny laundry room?
A wall-mounted accordion rack wins for small spaces. It extends 20 to 30 inches to hold a full load, then folds to about 3 inches deep against the wall. Over-the-door racks and retractable clotheslines are strong runners-up because they use zero permanent floor space.